
The Fundamentals of Heat Control
Why Top-Floor Spaces Lose Energy
Heat has a restless temper. The uppermost rooms absorb the full fury of solar gain while the lower floors stay cool. The roof slab becomes a reservoir of stored warmth, and once the sun retreats, that energy radiates downward, keeping bedrooms stifled until midnight. Trapped heat escapes upward to the cold sky, dragging your energy bills with it.
Consider this:
- Radiant heat from the roof surface transfers directly to the ceiling below.
- Air movement inside the room accelerates heat loss through gaps and joints.
- Uninsulated ceilings convert your living space into an accidental heat exchanger.
Without ceiling thermal insulation, this cycle continues uninterrupted. The ceiling is the only barrier between you and the outdoor climate, yet most homes treat ceiling thermal insulation as an afterthought. I have stood in Johannesburg attics where the temperature gap between floor and ceiling exceeded fifteen degrees, and the waste was almost audible!
Basic Principles of Heat Transfer
Heat control rests on three physical mechanisms, each demanding a separate strategy. Conduction moves energy through solid materials, so a ceiling board transmits directly unless a ceiling thermal insulation layer interrupts it. Convection transports warmth via air currents, which rise and settle against the uninsulated surface. Radiation transfers heat across empty space, bypassing the air entirely.
The common material used to manage these forces is a resistive barrier. Its job is to slow the transfer of thermal energy. Consider how a ceiling thermal insulation layer works:
- It introduces air pockets that trap conductive flow.
- It uses reflective surfaces to bounce radiant waves.
- It creates a dense matrix to halt convective currents.
Each mechanism receives its own countermeasure. Without such a system, the ceiling acts as a passive transmitter. In South African homes, that deliberate application separates comfortable interiors from thermal chaos.
Key Materials for the Job
A single material seldom fights all three heat mechanisms on its own. For ceiling thermal insulation in South Africa, the useful test is thermal resistivity, not thickness. Fibreglass batts resist conduction through a maze of still air. Reflective foil laminates bounce long wave radiant heat from the underside of the roof. Closed cell foam forms a continuous skin, shutting down convective movement inside the cavity. Any one of these is credible. The question is whether your ceiling cavity lets it perform.
Steel and timber roof structures complicate the picture. The supports conduct heat straight through the insulation, a phenomenon often ignored by glossy brochures. A well sealed ceiling thermal insulation system must cover each joist, while the material itself must stay dry. Moisture changes every material property. A damp batt conducts, a crumpled foil radiates, and an unsealed foam edge invites air currents. In South African summers and wet winters, those weaknesses turn a good product into a poor ceiling.
Selecting the Optimal Insulation Type
Comparing Fiberglass, Foam and Wool
In the highveld winters, the choice of ceiling thermal insulation determines whether your home hoards heat or surrenders it to the night sky. Fiberglass batts remain the workhorse, light to handle and forgiving on a budget, yet they demand careful cutting around trusses. Spray foam seals every crevice, though it asks for professional hands and a willingness to live with its finality. Wool, the quiet contender, regulates moisture while it insulates, a boon for the Cape’s damp coastal air.
The practical differences surface in the details:
- Fiberglass: cheap, itchy, and sagging if compressed
- Foam: airtight, expensive, impossible to remove
- Wool: breathable, renewable, and inviting to moths if untreated
Your attic’s geometry, your climate’s moods, and your appetite for maintenance all steer the decision. I have seen homeowners weep over foam’s rigidity and praise wool’s forgiving nature!
What R-Values Mean for Your Home
The R-value measures resistance to heat flow. For South African homes, the number on the label tells you how hard your ceiling thermal insulation will work against the highveld’s frost. A higher R-value means slower heat escape, but it also demands thicker batts or denser foam, which your trusses may not accommodate.
- R-value alone ignores air movement
- Compression reduces performance dramatically
- Installation quality matters more than the label
Selecting the optimal insulation type requires honesty about your attic’s height and your tolerance for disruption. A correctly fitted ceiling thermal insulation with a mid-range R-value often outperforms a premium spec installed poorly. The numbers guide, but your home’s structure dictates the final choice.
Balancing Cost and Performance
The cheapest ceiling thermal insulation on the shelf rarely remains the cheapest after a single Highveld winter. Heat loss through a poorly fitted but affordable product forces your heater to work harder, and that monthly meter reading becomes the real price tag. I have watched homeowners save R2 000 on installation only to lose triple that in electricity within two years.
Balancing cost and performance means comparing lifespan, settling behaviour and installation complexity, not just the rand per square metre. A mid-priced ceiling thermal insulation with consistent density often outperforms a premium product crushed into awkward truss spaces.
- Check the declared thermal resistance after compression, not before.
- Ask whether the supplier quotes installed or loose-laid performance.
- Confirm the product’s warranty covers sagging and moisture damage.
Spend once on a correctly fitted ceiling thermal insulation and you avoid the cost of stripping and replacing a failed layer.
Green Alternatives Worth Considering
Recycled cellulose produces a ceiling thermal insulation with 90 percent less embodied energy than glasswool, yet matches its R-value. For South African attics, this matters when your load-bearing ceiling is older. Hemp fibre boards, now SANS certified locally, offer a natural alternative that resists mould without chemical sprays. The choice is no longer a compromise between ecology and comfort.
Before specifying a green ceiling thermal insulation, check settling rates. Damp-sprayed cellulose interlocks with trusses, while loose-fill wool needs a deep, stable void. Consider the embodied transport, a Cape hemp board carries a lighter carbon footprint than an imported polyester batt.
- Borate fire retardants hold up better than ammonium sulphate in humid coastal air.
- Rodent resistance is often absent from natural fibre warranties, so verify it.
- Documented chain of custody for recycled content separates genuine green layers from marketing.
Step-by-Step Installation Guidance
Tools and Preparation Essentials
Preparation determines whether ceiling thermal insulation performs as promised. Before cutting a single board, inspect the cavity for moisture stains, exposed wiring, and pest damage. These issues will undermine your work if left untreated.
Your toolkit should include a sharp utility knife, a straightedge, a tape measure, a staple gun, and a dust mask. For fibreglass products, add heavy gloves and long sleeves.
Measure each bay individually. Joists rarely sit at perfectly uniform spacing, so trusting one measurement creates gaps. I always cut the ceiling thermal insulation slightly oversized for a snug fit. Work from the perimeter inward, tucking edges without compressing them. Dense packing reduces the material’s thermal performance and wastes your effort.
Hands-On Installation Techniques
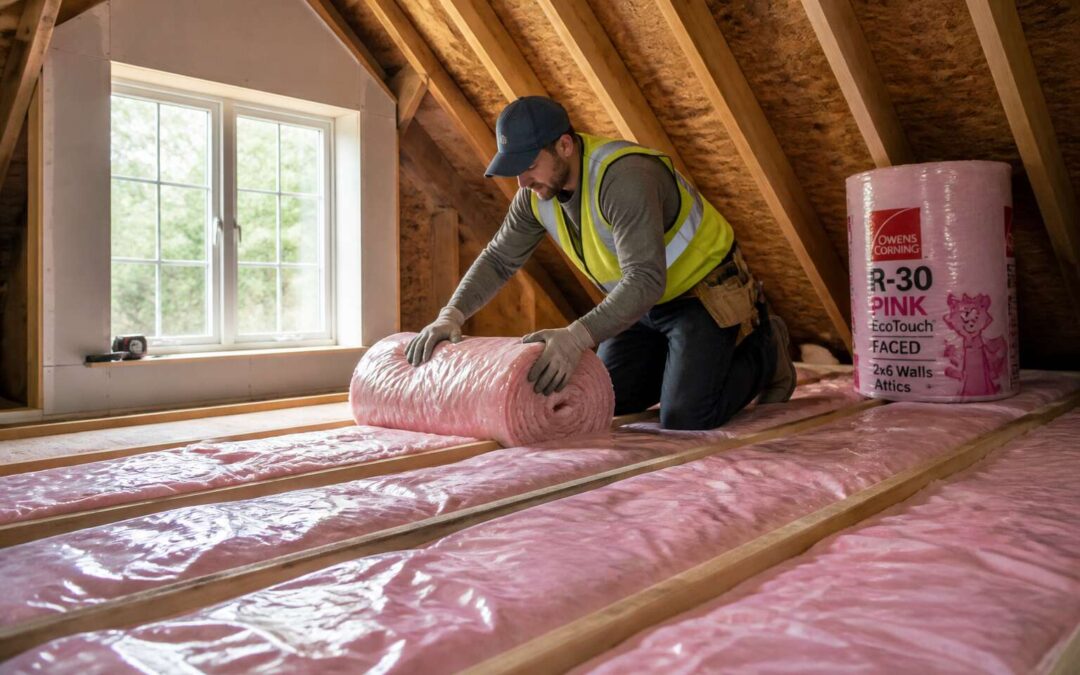
A compressed batten loses 30 percent of its insulating value, so technique decides how well ceiling thermal insulation performs. I start at the farthest corner and work back toward the hatch. Each bay gets its own measured strip. I press the board in with foil facing the living space, then staple the flanges every 150 millimetres. Let the insulation sit proud, never compressed. Patience matters for slopes and pipes! My sequence:
- Cut the blanket 20 millimetres wider than the bay.
- Lay it across the joists, then push it down so edges rest on the ceiling.
- Staple the vapour barrier to the joist’s side, not the top.
- Butt the next piece tightly, leaving no gaps.
I never walk on joists without a crawl board. After a few bays, I check for wrinkles, since a folded sheet of ceiling thermal insulation loses its R-value. Material should lie flat. Trim around corners and boxes with a sharp knife.
Professional vs. DIY Approaches
Deciding between a professional installer and a DIY weekend depends on your home’s geometry and your tolerance for risk. A qualified contractor brings calibrated tools, scaffolding, and insurance, and understands local building regulations. They can advise on the right ceiling thermal insulation for your specific climate zone. A poorly fitted product fails silently, losing R-value behind a finished ceiling.
DIY offers savings on labour, but the hidden costs are real:
- Labour costs versus your weekend hours.
- Access to safety equipment and liability coverage.
- Accountability for defects after the job is done.
Most manufacturers void claims when ceiling thermal insulation installations lack a professional sign-off. In the Highveld, where summer heat radiates through the roof, mistakes are unforgiving. I usually recommend a site inspection before committing. Weigh the contractor’s fee against your comfort and your ceiling’s lifespan.
Steering Clear of Frequent Errors
Up to 30% of conditioned air escapes through an untreated roof space. Yet most ceiling thermal insulation failures trace back to three fixable mistakes, not the product itself.
First, measure the cavity before you buy. A 100 mm gap performs differently than a 250 mm void. Second, inspect for moisture stains. Fix the leak before you lay anything down. Third, never compress the material into a tight space. Compressed ceiling thermal insulation loses its loft and its R-value.
- Beware of recessed downlights without fire-rated hoods.
- Do not block the eave vent with offcuts.
- Never staple foil across the cavity without leaving an air gap.
In the Highveld, these small decisions determine your comfort for the next twenty years.
Protective Gear and Safety Protocols
Putting on ceiling thermal insulation is a straightforward job if you respect the process. I always switch off the circuit breaker for the roof lights first. This protects you from live wiring that often runs through the loft space.
Your protective gear matters more than your technique. Wear a dust mask, safety goggles, and long sleeves. Fibres cause itching and respiratory irritation. And please, keep the fresh air flowing!
- Lay planks across the ceiling joists for a stable walking surface.
- Keep a torch within reach for dark corners.
- Work from the edges toward the centre.
Never work alone when installing ceiling thermal insulation. A second person hands you materials and can call for help.
Benefits That Extend Beyond Heating
Reducing Monthly Utility Costs
Eskom tariffs have a habit of climbing faster than your heart rate during load shedding. That is why ceiling thermal insulation does more than keep your toes warm in a Joburg winter. It reduces your monthly utility bill by cutting the need for air conditioning, which matters when summer heat turns your top floor into an unbearable space.
In my experience, the savings show up in three clear areas:
- Cooling costs drop because the insulation blocks radiant heat from the roof.
- Heating costs stay low since warm air no longer escapes through the ceiling.
- Your HVAC system runs less often, extending its lifespan and trimming maintenance.
The result is a quieter, more comfortable home and a bank balance that thanks you every month! Ceiling thermal insulation is an investment that pays for itself, especially in South Africa’s variable climate.
Enhancing Home Comfort and Stability
I have watched homeowners notice more than lower bills. After installing ceiling thermal insulation, they describe bedrooms that feel calmer and hallways that no longer echo. The material mass absorbs noise from rain, wind, and passing traffic. It also flattens the uncomfortable temperature swings between day and night. In Highveld homes, where afternoon sun heats the roof and evenings turn cold, this stability matters.
Comfort becomes predictable. You stop adjusting blankets or fans, and the house stops dictating your schedule. A steady indoor environment also protects wooden furniture and flooring from humidity damage. Ceiling thermal insulation delivers this constancy without drawing attention to itself.
Preventing Dampness and Mold
Damp ceilings are a persistent problem in South African homes. When warm interior air rises and meets a cold roof surface, it condenses into moisture that feeds mold. Ceiling thermal insulation changes this dynamic by keeping the ceiling surface closer to room temperature, which reduces condensation at its source.
Homes with persistent mold often carry a musty smell that clings to curtains and carpets. Installing ceiling thermal insulation interrupts the cycle before it starts. Less moisture in the structure means fewer stains on ceiling boards and less decay in wooden beams. The difference is visible within weeks, not years.
- Prevents black spot mold on painted surfaces
- Reduces rot in roof timbers
- Stops damp patches from spreading across walls
Highveld homeowners face summer thunderstorms and winter frost, both of which drive moisture into building materials. A stable ceiling temperature keeps that moisture from settling where it causes damage.
Adding a Sound Barrier
Traffic rumbles, barking dogs, and a neighbour’s bass line drift through ceilings with ease. Ceiling thermal insulation performs a second duty beyond temperature control; it interrupts airborne noise before it reaches your living space. The same fibrous structure that traps heat also dissipates sound waves, turning a thin, drum-like ceiling into a muffled barrier.
This acoustic benefit matters in South African homes where corrugated iron roofs amplify rain and hail. A layer of dense insulation reduces the metallic chatter to a soft patter. It also keeps conversations private between storeys, a quiet advantage that property buyers notice.
- Softens impact noise from footsteps above
- Reduces echo in high-ceilinged rooms
- Blocks high-frequency sounds like alarms or sirens
The effect strengthens with thicker layers, but even a modest installation changes how a room feels. Ceiling thermal insulation works for your ears as much as your energy budget.
Boosting Property Appeal
In a market where buyers scrutinise every utility bill, ceiling thermal insulation has become a primary feature. South African estate agents notice it immediately. Homes with insulated ceilings attract more serious offers. That layer of material in the roof cavity signals a home that costs less to run and feels better to occupy.
Buyers who have lived through cold Highveld winters and sweltering coastal summers understand the difference. A properly insulated ceiling protects against temperature swings, moisture buildup, and street noise. These factors shape their willingness to pay.
Some property professionals rank the benefits in order of importance.
1. Lower energy consumption in winter
2. Reduced dampness and musty odours
3. Better sleep due to a quieter environment
When you eventually sell, the ceiling thermal insulation pays for itself. It upgrades the home’s perceived value without requiring visible renovations. That hidden advantage often tips a negotiation in your favour.