
Evaluating Your Insulation Requirements
Understanding Insulation Types
Complacency is the quiet killer of comfort. Most homeowners assume their ceiling is doing the work, but the truth often hides in blistering summer attics and freezing winter drafts. A proper ceiling insulation installation guide must start not with pink batts, but with a ruthless audit of your current situation. The R-value you need is dictated by your local climate zone, the orientation of your roof, and the square meterage of your home. Ignoring these variables is like building a wall without measuring the door.
Here is where the real detective work begins. You must crawl into the roof space and inspect for moisture ingress, blocked vents, or pest damage. These perils compromise any insulation you lay down later. The material you select must form a complete thermal blanket, with no voids. When you understand the physical constraints, the choice between options becomes clear. A hybrid approach often yields the best results, but your decision hinges on budget and moisture levels. Consider the common types available.
- Glasswool and rockwool, which are fire resistant and cost effective but require careful sealing.
- Polyester quilts, which are safe to handle and resistant to humidity.
- Reflective foil, which is efficient for radiant heat in sunny provinces but requires a specific air gap.
- Cellulose fibre, which is blown in and offers excellent noise dampening but can settle over time.
The most critical step is measuring your ceiling cavity depth before you buy anything. If the joists are only 100 mm deep, you cannot fit a high performance bulk insulation layer without raising the roofing material. This is the point where many DIY attempts fail, leaving gaps that defeat the entire purpose. By matching the product to the physical space, you ensure that the thermal resistance you pay for actually remains intact. The correct evaluation now prevents a costly redo later.
Calculating Recommended R-Value
Evaluating your insulation needs starts with a clear formula. The recommended R-value for your ceiling depends on the climate zone where you live. In South Africa, the map splits into coastal, highveld, and bushveld regions, each with different thermal demands.
I always measure the roof pitch first! A steep pitch increases the cavity volume, which lowers the effective R-value per square metre. Then I check for nearby trees or buildings that might provide shade. These elements shift your calculation by a full unit.
Here is the calculation method:
- Find your zone’s target R-value from a national standard.
- Calculate the heat flow through your roof using the area and temperature difference.
- Subtract the existing insulation’s performance from the target.
The final number is the missing resistance. That value guides every purchase you make in this ceiling insulation installation guide.
Measuring Your Ceiling Area
Measuring your ceiling area is an act of confrontation with the space above your head. Most ceilings hide a topography of beams, ducting, and recessed lighting beneath the surface. A simple length times width calculation will betray you. The true measurement requires you to map every interruption.
I start by sketching the ceiling outline on paper, then work in sections. Multiply length by width for rectangles. Divide irregular shapes into triangles and rectangles. Then subtract the voids where insulation cannot sit.
Consider these obstructions:
- Recessed downlights require clearance zones.
- Timber trusses create dead spaces.
- Extract fans and piping break continuity.
Each recess alters the true area. The number you record becomes the foundation of the ceiling insulation installation guide. Measure twice, because the gap between a guessed area and the measured one is where heat escapes.
Inspecting Existing Insulation
An old ceiling can hide decades of poor insulation. I inspect existing installations before recommending any new material. I look for compression, moisture damage, and pest activity. Each layer of old material reveals something about the remaining thermal protection.
Here is the sequence I follow during inspection:
1. Check for water stains on ceiling boards and roof timbers.
2. Measure the settled depth of existing insulation against the original thickness.
3. Look for gaps around downlights, extractor fans, and pipe penetrations.
These gaps create weak points in the thermal barrier. They undermine every kilogram of insulation installed above them. This evaluation determines your actual requirements, whether you need a top-up or a full replacement. It separates a reliable ceiling insulation installation guide from the guesswork that inflates electricity bills. A proper ceiling insulation installation guide accounts for these existing conditions before installation begins.
Gathering Necessary Tools and Materials
Evaluation happens after inspection but before purchase. I compare the measured thermal resistance against your local municipality’s minimum. Then I calculate the cost of heating or cooling lost through the ceiling. That number determines whether a top-up will ever pay for itself. For many older Johannesburg homes, full replacement beats patching.
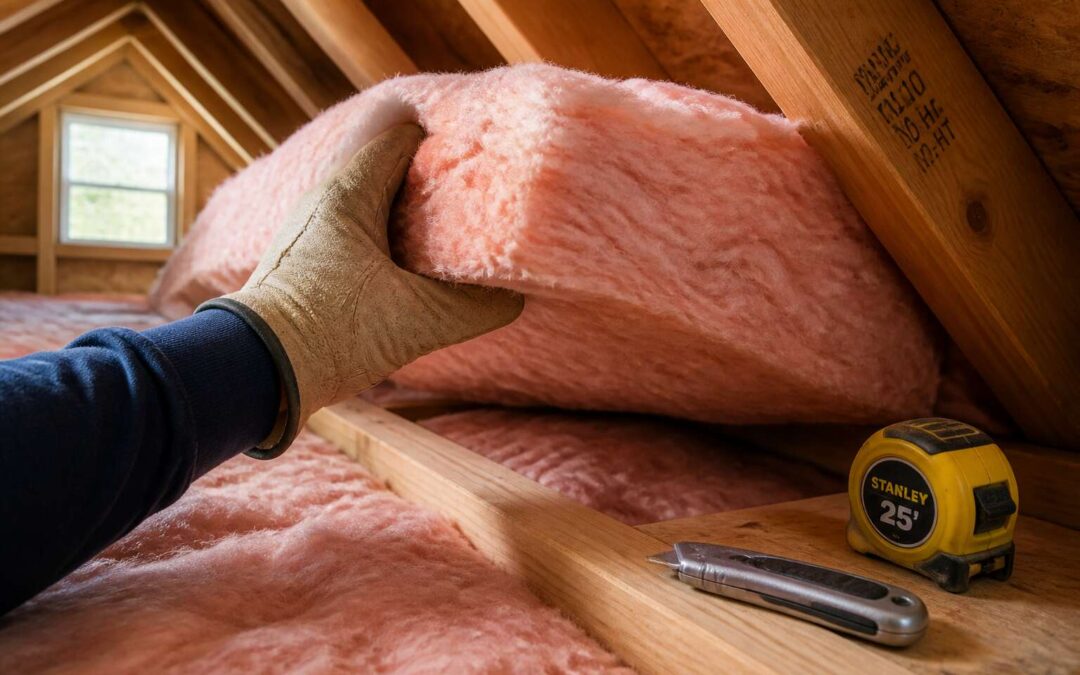
Gathering tools requires planning. You need a tape measure, a utility knife, a dust mask, and a staple gun. For loose-fill materials, you need a blowing machine. For batts, you need a sharp blade and a straightedge.
- Confirm the existing insulation is dry and uncompressed.
- Order at least ten percent extra material for cutting waste.
- Arrange delivery before the rainy season.
These steps keep the ceiling insulation installation guide practical and safe. Preparation prevents delays and protects the thermal barrier.
Preparing Your Work Area
Clearing the Space Above
During countless attic inspections, I’ve uncovered snakeskin, old love letters, and enough bird nests to start a museum. Clearing this cavity is the first step in any ceiling insulation installation guide. Your work area must be empty enough to move freely without knocking over stored boxes or disturbing wiring.
South African homes face unique challenges, from termite dust to heat-softened roof trusses. Every object that sits above the ceiling joists needs to be relocated. Sagging sections or loose boards often lurk within the cavity. These issues will compromise the final result.
Typical clutter you’ll encounter:
- Abandoned holiday decorations
- Pest droppings and nesting material
- Discarded construction offcuts
A tidy space allows for equal distribution of insulation, preventing gaps and thermal bridges. Skipping this step invites moisture buildup and fire hazards. A clear workspace is a prerequisite for a successful ceiling insulation installation guide.
Sealing Air Leaks and Gaps
A single unmended gap around a ceiling downlighter can bleed more warm air than a half-open window. Before you lay a single roll, hunt down every breach in your ceiling plane. South African homes are notoriously drafty where cables, pipes and ducting pass through the plasterboard.
Seal small cracks with acrylic mastic and close larger openings with expanding foam. For fire-rated downlighters, choose a sealant rated for high temperatures. Don’t forget the manhole cover, a perennial offender.
- Light fitting penetrations
- Plumbing and electrical entries
- The access hatch trim
Eliminating these thermal bypasses is the hidden heart of a successful ceiling insulation installation guide.
Ensuring Proper Ventilation
The work area demands order before the first bag of insulation is opened. Dust from aged thatching or decaying ceiling boards will travel into every room. Lay heavy-duty sheeting across floors and seal doorways with masking tape.
Ventilation requires proper attention. Insulation fibres and fine dust accumulate quickly inside a ceiling cavity. Open every window near the workspace and place a fan at the access point to draw stale air outward. Verify the flow before you begin.
Ventilation checks keep the process honest:
- Confirm roof vents are not blocked
- Position the fan to blow outward
- Keep doors closed to the rest of the house
A ceiling insulation installation guide succeeds when the installer breathes clean, moving air throughout the task. The household shares that same air, so the effort is never wasted.
Setting Up Safety Equipment
A single misstep on a dusty joist sends the whole project sideways. The floor below the access point demands clearing before anything else. Move furniture, roll up rugs, and tape down cords. Set your ladder on level ground, then climb slowly to inspect the opening. Once inside, your safety equipment works as a barrier between you and the cavity’s sharp edges, stray nails, and old wiring.
- Helmet with a chin strap
- Safety glasses that seal around the eyes
- Dust mask rated for fine particles
- Gloves with grip on dusty wood
Use a headlamp instead of a loose torch. Switch off power to the ceiling circuits and verify with a voltage tester. Lower your tools in a bucket on a rope, never in your pocket. A protected work area turns a ceiling insulation installation guide into a safe routine. The ladder remains planted, and the work proceeds in order.
Selecting the Optimal Insulation Product
Fiberglass Batts and Rolls
In the dim quiet of an unfinished attic, the choice between fiberglass batts and rolls feels ritualistic. Batts are pre-cut slabs that fit neatly between joists. Rolls offer unbroken lengths for sprawling spaces. Both require attention to density and facing.
For this ceiling insulation installation guide, consider the kraft paper facing. It acts as a vapour barrier, but only against the warm side. Unfaced product suits layering over old insulation. Thickness matters less than compressed quality; a flimsy batt cannot resist air movement!
- Check the fibre’s resilience with a squeeze
- Examine edge integrity for clean fits
- Confirm the facing aligns with your climate
Respect the R-value per inch, but distrust numbers alone. The true test appears in the seasonal silence of your home.
Blown-in Cellulose Options
Blown-in cellulose arrives as loose grey fluff, made from recycled newsprint and treated with borates. It settles into every gap with a soft, steady collapse. In a ceiling insulation installation guide, this material rewards those who respect its shifting character.
Unlike batts, which sit where you place them, cellulose needs its own internal logic. Density governs everything. A loose fill will compact over time, losing height and R-value. An overblown pocket blocks ventilation and traps moisture. Installers calculate the correct bag weight per square metre, then return after a few weeks to measure the true settled depth. That second visit corrects any early assumptions.
Moisture management separates durable cellulose from weak material. Durable cellulose uses fibres coated with a light oil or a desiccant; these resist damp that arrives through hairline cracks. Colour remains uniform, texture springy rather than dusty. A handful should not shed powder in the air.
Spray Foam Solutions
When selecting spray foam for your ceiling, the distinction between closed cell and open cell changes everything. Closed cell foam expands densely, forming a rigid barrier that also blocks moisture. Open cell foam is lighter, softer, and quieter, but it never stops air movement as completely. I have seen many ceilings where mixing both solves the entire assembly. For example, closed cell on the lower side, open cell higher up.
In a ceiling insulation installation guide, spray foam stands apart because it bonds directly to the roof deck. That prevents sagging and shifting over time. It also chases out the drafts you cannot see.
- Closed cell has a higher R-value per centimetre.
- Open cell is cheaper and easier to trim.
Professional mixing is essential. Incorrect proportions prevent the product from curing properly.
Reflective or Radiant Barriers
Radiant barriers do not resist heat flow like bulk insulation. They reflect thermal radiation back toward its source. In South African ceilings, where the sun pounds the roof deck for most of the year, that distinction matters. The aluminium surface must face an air gap of at least 25 mm to function at all.
When selecting the optimal insulation product, reflective or radiant barriers work best in combination with the materials you already installed. They are not a replacement. They are a correction for the missing half of the thermal problem. Consider these points before committing:
- The barrier’s emissivity rating, which should be 0.05 or lower.
- The dust accumulation on the reflective face, which reduces performance over time.
- The orientation of the air gap, which changes with roof pitch.
Your ceiling insulation installation guide should treat radiant barriers as a finishing layer, not a standalone solution. They stop the heat that mass insulation simply slows down.
Comparing Costs and Efficiency
Cost per square metre is the first number most people check, but it rarely tells the whole story. A cheaper material with a lower R-value per centimetre may force you to install a thicker layer, which eats into headroom and increases labour time. Conversely, a premium product might cost more upfront but deliver a higher R-value in a thinner profile.
The real calculation is cost per R-value per square metre, not the sticker price. Your ceiling insulation installation guide should push you toward that metric, because it lets you compare fibreglass, cellulose, and spray foam on an equal footing.
Local pricing fluctuates with oil prices and import duties. Check current supplier quotes before committing. Prices shift fast! A proper ceiling insulation installation guide should also account for installation time, since a slower product carries a hidden labour cost.
Consider these cost drivers:
- Delivery fees outside major metros
- Loose-fill equipment rental
- Old insulation disposal
- Professional labour rates
Executing the Installation Process
Laying Batts Around Obstacles
A single uncovered gap around one recessed downlight can negate the insulation value of an entire ceiling bay. This is where a ceiling insulation installation guide earns its keep.
Cut batts with precision, not compression. Use a straightedge and a sharp utility knife. For pipes and cables, split the batt in half and tuck each piece around the obstruction. This preserves the loft and density. Never force a batt into a tight space. Compressed batts lose their R-value!
Common obstacles to manage:
- Recessed lighting housings
- Bathroom extractor fans
- Electrical junction boxes
- Plumbing vent stacks
Work the material into each cavity with your fingers. A neat fit beats a fast one. This detail separates a proper ceiling insulation installation guide from a rushed job.
Installing Vapor Barriers
Moisture is the quiet enemy of any ceiling insulation installation guide. A vapor barrier stops damp air from reaching the insulation where it condenses and destroys thermal performance. Coastal South African homes face this daily.
Executing the installation properly means getting the details right:
– Staple the polyethylene sheeting to the underside of the joists, warm side facing the living space.
– Overlap each sheet by 150 mm.
– Seal every seam with acoustic tape.
– Cut tight holes for pipes and cables, then seal the punctures.
Do not trap moisture between two barriers. That creates a mold farm! One layer, correctly placed, does the work. That is the execution. No shortcuts.
Sealing Around Recessed Fixtures
Recessed downlights are the trickiest part of any ceiling insulation installation guide. These fixtures create gaps in your thermal barrier, and those gaps let air pass freely. In coastal South African homes, that means warm air escapes and moisture follows.
First, confirm the fixtures are IC-rated. This means they can be safely covered by insulation without fire risk. Non-IC fixtures require a clearance zone, which defeats the purpose of a continuous layer.
I prefer building a sealed box:
- Construct a barrier from sheet metal or a purpose-made cover.
- Seal the box to the ceiling with acoustic caulk.
- Leave no gaps for air movement.
This method keeps insulation away from the heat source while stopping airflow. The result is a sealed ceiling that performs as intended.
Handling Pipes and Wiring
Running a proper ceiling insulation installation guide must address the pipes and wiring that cross your ceiling cavity. Electrical cables often rest directly on the ceiling boards, while plumbing pipes may dip lower than the joists. Patience matters here.
For wiring, keep cables visible and free from compression. Insulation should sit around the cables, never over them in a way that traps heat. For pipes, check for leaks before you begin. A hidden drip can ruin new insulation within weeks.
When handling these components, follow this sequence:
1. Identify all cables and pipes before placing any material.
2. Route insulation neatly beneath or around each fixture.
3. Use cardboard or plastic barriers to keep loose fill away from pipe joints.
4. Test for excessive heat around older wiring after installation.
These details turn a good ceiling insulation installation guide into one that lasts.
Ensuring Complete Coverage and Thickness
The ceiling insulation installation guide is unforgiving when it comes to coverage. I have walked attics where the batts stopped short, leaving whole stretches of ceiling board exposed to the cold. Those gaps undermine everything else. Every joist bay deserves its full allocation. Where the material ends, heat escapes. So do not trust your eye alone. Measure the depth. Feel for voids.
Thickness demands equal attention. A thin layer may look tidy, but it will not hold back the highveld chill. If the insulation is uneven, the worst of winter finds the weak points. Add more batts where the cavity allows. Do not compress them. The air between the fibres does the work.
Work through the space systematically, tucking edges into corners and pressing material around obstructions. Complete coverage and honest thickness are what make the effort worthwhile!
Verifying and Maintaining the Results
Checking for Compressed Areas
In the previous section, we discussed ensuring complete coverage and thickness. Now, let’s verify the work! A compressed batt loses roughly half of its stated R-value, so the fluffed appearance of new insulation is not decorative. It is function. I have walked through ceiling spaces where homeowners proudly showed me their fresh installation, only to find sections crushed by stored boxes or a careless footstep. The damage is silent and heat finds those thin zones first.
Compression happens in three common ways:
- Storing items directly on top of the insulation
- Walking between joists without a crawl board
- Pulling batts too tight against wiring
Each method flattens the air pockets that give insulation its resistance. Run your hand across the surface. It should feel springy. Dense or matted sections need fluffing or replacement. A proper ceiling insulation installation guide always reminds you that verification is a continuous discipline. The R-value you planned for only exists when the material retains its shape.
Addressing Moisture Concerns
Moisture is the primary concern for any ceiling insulation installation guide. Once the batts are laid and the vapor barrier is sealed, the work is not finished. I have seen installations ruined by a single leaking pipe or a roof sheet that shifted during a Highveld storm. The insulation absorbs the dampness, clumps together, and loses its thermal resistance. Worse, the moisture creates conditions for mold growth.
Regular inspection is the only defence. Check for water stains on the ceiling below. Feel the underside of the roof for condensation. Look for discoloration or matted sections. If you find moisture, trace it to the source before replacing the affected material. The usual culprits are often easy to identify:
- Leaking roof sheets
- Condensation from poor ventilation
- Plumbing pipes running through the ceiling space
Addressing moisture concerns promptly preserves the R-value you worked so hard to achieve!
Restoring Access and Sealing the Workspace
Verification is the final ritual before the ceiling insulation installation guide moves to its last act. I crawl toward the access hatch, torch beam cutting through settled dust. The batts lie uniformly, evenly spaced and intact. Check the seal around the hatch frame. Feel for drafts. A loose access point undoes the work of every square meter above.
Run a hand along the plasterboard below. It should feel neutral, neither hot nor cold. The house now breathes differently. Before sealing, confirm the essentials:
- Vapor barrier tape still adheres at every seam
- No batt overlaps or exposed gaps near the eaves
- Access hatch insulation remains firmly attached
Close the workspace with purpose. Screw the hatch back, press the trim flush. The ceiling insulation installation guide ends here, with silence and a steady indoor temperature.
Scheduling Periodic Inspections
I often remind clients that a ceiling insulation installation guide is not a one-time ritual. The final inspection matters, but so does the next one! Every six months, climb into the ceiling space and run a torch across the batts. Look for displacement caused by wind, pests, or careless storage.
Check the vapor barrier seams again. Press gently to confirm adhesion. Feel the plasterboard ceiling from below; a sudden cold spot may signal a gap. South Africa’s highveld winters and coastal humidity accelerate wear. This is why your ceiling insulation installation guide should include a scheduled review.
- Inspect the access hatch for gaps
- Verify no batt has slipped near the eaves
- Look for condensation streaks on pipes
Keep a simple log of these inspections. I write mine on the hatch frame itself. This habit turns an ordinary checklist into a living document, protecting your home year after year.