Understanding Ceiling Insulation
Definition and Purpose – Explaining what ceiling insulation is and why it is essential for energy efficiency
Ceiling insulation is often the unsung hero of a home’s energy efficiency, quietly working behind the scenes to keep warmth in during the winter and out during the summer. Think of it as a snug blanket for your entire house—without it, even the most sophisticated heating system struggles to perform optimally. Its fundamental purpose is to minimise thermal transfer, reducing energy bills and carbon footprint, all while maintaining a comfortable indoor environment.
Understanding ceiling insulation sizes is crucial because a perfect fit ensures maximum effectiveness. Oversized insulation might cause compression and reduce its insulating properties, while undersized material leaves gaps that allow heat to escape. To get it just right, consider factors like ceiling height, attic space, and the type of insulation used. Typically, the right ceiling insulation size aligns with the recommended thickness for your specific climate zone, ensuring your home remains cosy without wasting resources.
Types of Ceiling Insulation – Different materials used, such as fiberglass, mineral wool, spray foam, and reflective insulation
Ceiling insulation isn’t just about the quantity of material; it’s about choosing the right type to optimise energy efficiency. Each insulation material offers unique properties, making the selection process both intriguing and critical. Fiberglass, for instance, is the most common choice, valued for its affordability and ease of installation. Mineral wool provides superior soundproofing and fire resistance, ideal for homes in noisy or fire-prone areas. Spray foam, with its seamless application, creates an airtight barrier that significantly reduces heat transfer, but requires professional installation. Reflective insulation, often made from aluminium foil, works by reflecting radiant heat away from your living space—perfect for warmer climates.
Understanding ceiling insulation sizes isn’t solely about thickness; it involves tailoring the insulation to your specific needs and climate zone. The effectiveness of each material hinges on its size and density. To grasp the variety, consider this list:
- Fiberglass rolls or batts, typically available in sizes ranging from 100mm to 300mm thick.
- Mineral wool insulation, often found in similar dimensions, with the added benefit of higher compressive strength.
- Spray foam, which expands to fill gaps, with thickness adjustable during application but generally set between 50mm and 150mm.
- Reflective insulation, which is usually installed in multi-layer formats, with thickness less critical but installation size still important for effective radiant heat reflection.
Choosing the correct ceiling insulation sizes is a delicate balancing act—too thick, and it risks compression, reducing its insulating properties; too thin, and it leaves gaps that allow heat to escape. The material’s size must align with the specific requirements of your home’s design and climate to unlock its full potential.
Standard Ceiling Insulation Sizes
Common Thickness Measurements – Typical insulation thicknesses, such as 100mm, 150mm, 200mm, and their suitability
When it comes to choosing the right ceiling insulation sizes, precision is paramount — after all, no one appreciates a poorly fitting jumper, nor should they settle for inadequate thermal protection. Typical insulation thicknesses such as 100mm, 150mm, and 200mm are commonly used in residential settings, each tailored to specific needs and regional climate considerations. In essence, the thicker the insulation, the greater its thermal resistance, or R-value, which translates directly into a warmer, more energy-efficient home.
For most UK homes, a 100mm thickness might suffice for moderate climates, but in colder regions, 150mm or even 200mm often becomes the gold standard. Interestingly, the choice of ceiling insulation sizes also hinges on the type of material — whether fibreglass, mineral wool, or spray foam — each with its own optimal thickness for maximum performance. It’s worth noting that, while a 100mm layer provides decent insulation, a 200mm barrier can dramatically reduce energy bills and carbon footprint.
In the realm of ceiling insulation sizes, a nuanced understanding can make all the difference. Here’s a quick overview of typical sizes and their suitability:
- 100mm – Adequate for mild climates, budget-conscious projects, or supplementary insulation.
- 150mm – Ideal for average UK conditions, balancing cost and efficiency.
- 200mm – Best for colder regions or when aiming for maximum energy savings.
Choosing the right ceiling insulation sizes isn’t just a matter of throwing in the thickest material available. It’s about precise measurement, regional climate awareness, and understanding that the proper thickness can subtly yet significantly influence energy consumption and comfort levels.
Standard Widths and Lengths – Typical rolls or batts dimensions, like 1200mm width, 2400mm length
Standard ceiling insulation sizes form the backbone of any effective thermal barrier, providing a seamless fit that maximises energy efficiency. Typically, rolls or batts come in dimensions like 1200mm in width and 2400mm in length, allowing installers to cover large areas with minimal joints. These measurements are designed to adapt effortlessly to most UK ceiling spaces, ensuring a snug, professional fit every time. When selecting ceiling insulation sizes, understanding the dimensions helps prevent wastage and reduces installation time, making your project both cost-effective and environmentally conscious.
For larger spaces, it’s common to see rolls of insulation that measure 1200mm by 2400mm, but smaller batts—such as 600mm wide—are also available for more detailed or complex ceiling layouts. This versatility means you can tailor your approach to the specific requirements of each room, whether it’s an attic conversion or a new build. The proper sizing of ceiling insulation ensures a uniform layer that traps heat effectively, avoiding gaps or compression that diminish thermal performance.
- 1200mm x 2400mm rolls are the industry standard, offering a simple, broad coverage ideal for most residential ceilings.
- 600mm widths are perfect for fitting between joists in homes with narrower spacing or custom spaces requiring precision cuts.
Knowing the typical widths and lengths of ceiling insulation sizes helps in planning a project with confidence. The goal is to achieve a perfect fit that maximises thermal resistance while minimising wastage. When considering ceiling insulation sizes, keep in mind that selecting the right dimensions can make a significant difference in both the efficiency of the insulation and the ease of installation, ultimately leading to a warmer, more sustainable home environment.
Pre-cut vs Custom Sizes – Advantages of pre-cut insulation sizes versus custom cutting options
When it comes to ceiling insulation sizes, choosing between pre-cut options and custom sizes can feel like a game of chance. Pre-cut insulation sizes offer a straightforward, no-fuss solution — ready to install right out of the pack. They’re designed to fit standard UK ceiling dimensions, reducing the need for on-site modifications. This not only speeds up installation but also minimises waste, making it a cost-effective choice for many projects. Plus, the consistency of pre-cut sizes ensures a uniform layer that traps heat more effectively, boosting energy efficiency.
On the other hand, custom sizes provide flexibility for intricate ceiling layouts or non-standard joist spacings. They demand a bit more skill and effort, but the payoff is a perfectly tailored fit. When selecting ceiling insulation sizes, understanding whether to opt for pre-cut or custom options is vital for streamlining the project and maximising thermal performance. Sometimes, the unknown lurking behind a seemingly simple choice can make all the difference in achieving a warmer, more sustainable home environment.
Factors Influencing Insulation Size Selection
Building Regulations and Codes – Local standards dictating minimum insulation thickness and R-values
In the realm of building design, the size of ceiling insulation is not merely a matter of convenience but a reflection of deeper societal values—energy conservation, environmental responsibility, and occupant comfort. Yet, these choices are often dictated by strict building regulations and codes that serve as the moral compass for sustainable construction. Local standards mandate minimum insulation thickness and R-values, which act as a safeguard against the excesses of waste and inefficiency.
Understanding these regulations reveals a layered landscape—where compliance is intertwined with the inherent human desire for security and efficiency. For instance, many regions specify that ceiling insulation sizes must meet or exceed a prescribed R-value, ensuring that homes and commercial properties maintain thermal integrity. These standards often evolve, driven by climate considerations and technological advancements, shaping the very fabric of our built environment.
The complex dance between regulation and real-world application might seem daunting, but it is ultimately a reflection of our collective pursuit of better, more responsible living spaces. As we navigate the labyrinth of local standards, the choice of ceiling insulation sizes becomes an act of moral intent—balancing safety, sustainability, and human comfort in every decision made.
Climatic Conditions – Adjusting sizes based on climate zones for maximum efficiency
Climatic conditions are a fundamental factor in determining the appropriate ceiling insulation sizes for any building. In colder regions, thicker insulation layers are essential to prevent heat loss, while milder climates may require less to achieve optimal energy efficiency. This careful calibration ensures that the thermal barrier is neither excessive nor inadequate, aligning with both building regulations and environmental needs.
Adjusting ceiling insulation sizes based on climate zones is a strategic approach that maximises efficiency. For example, in northern UK regions, insulation thicknesses often need to exceed the minimum standards to combat the harsh winter temperatures. Conversely, warmer areas might prioritise reflective insulation and thinner layers, reducing unnecessary costs and material use.
Understanding regional climate variations helps in selecting the right ceiling insulation sizes. Many regulations specify minimum R-values that correspond to local weather patterns, ensuring homes and commercial structures remain comfortable year-round. This nuanced approach showcases how climate considerations shape responsible building practices and energy conservation efforts.
Ceiling and Attic Space Dimensions – Measuring your attic for optimal fit and coverage
Measuring your attic might not be the most glamorous task, but it’s the secret sauce for getting those ceiling insulation sizes just right. An ill-fitting layer of insulation can either leave you shivering in winter or sweating through summer, all while wasting precious energy. So, grab a tape measure and prepare to channel your inner engineer—precision is key!
When assessing your attic space, remember that dimensions are king. Typical widths like 1200mm or 600mm (yes, those standard battens are everywhere) and lengths up to 2400mm are common starting points. However, irregularly shaped attics or those with obstructions demand bespoke measurements. This ensures the ceiling insulation sizes chosen are a snug fit, avoiding gaps that compromise thermal efficiency.
In some cases, pre-cut insulation might seem tempting, but custom sizes often provide a tighter seal—like a bespoke tailored suit for your roof. Understanding your attic’s unique dimensions allows for optimal coverage and adherence to local building regulations, which specify minimum R-values and insulation thicknesses. After all, choosing the right ceiling insulation sizes isn’t just about filling space; it’s about creating a reliable thermal barrier that’s both cost-effective and compliant with standards.
Measuring for Ceiling Insulation Sizes
Tools Needed – Measuring tapes, laser distance meters, and other essentials
Accurate measurement of ceiling insulation sizes is the foundation of a seamless, energy-efficient installation. When venturing into this task, the right tools transform guesswork into precision. A sturdy measuring tape is indispensable, offering straightforward accuracy for smaller spaces. For larger or more complex attic layouts, a laser distance meter becomes invaluable, effortlessly spanning distances with impressive precision.
The key to getting it just right isn’t solely relying on tools but understanding what to measure. You’ll want to record the length and width of your attic or ceiling space—details that directly influence your choice of ceiling insulation sizes. In some cases, a simple
- measuring tape
- laser distance meter
suffices, but in more intricate spaces, additional essentials such as a sturdy ladder, a chalk line for marking, and a calculator to determine volume are worth having on hand.
By meticulously gauging your space, you ensure the ceiling insulation sizes selected will provide optimal coverage, meeting both regulatory standards and your energy-saving ambitions.
Step-by-Step Measurement Process – How to accurately measure your ceiling dimensions
Accurately measuring your ceiling dimensions is the cornerstone of selecting the perfect ceiling insulation sizes. A miscalculation can lead to gaps, inefficiencies, and the frustrating need for rework—something no homeowner wishes to encounter after investing in insulation. The process begins with gathering the right tools, notably a sturdy measuring tape and a laser distance meter, which make the task both straightforward and impressively precise.
Start by measuring the length and width of your attic or ceiling space. For simplicity, use a measuring tape for smaller, straightforward areas. When dealing with larger or more complex layouts, a laser distance meter can effortlessly span the distances, providing exact measurements in seconds. To ensure accuracy, record each dimension carefully, ideally twice, to avoid any slip-ups. Once you have these figures, you can determine the total area—an essential step in choosing the correct ceiling insulation sizes that will fit flawlessly and meet regulatory standards.
In some instances, it’s helpful to consider the following steps:
- Mark your measurements with a chalk line for clear visualisation.
- Calculate the volume of insulation needed by multiplying area by desired thickness.
- Compare your measurements with standard roll or batt sizes, typically 1200mm wide and 2400mm long, to streamline your purchase.
Meticulous measurement is the secret to ensuring your ceiling insulation sizes provide optimal coverage, helping your home stay warm and energy-efficient with minimal fuss or waste. After all, precision is the true mark of an attic well-insulated and a homeowner well-satisfied.
Calculating Required Insulation – Estimating quantities based on measured areas and chosen thickness
Calculating the right ceiling insulation sizes is crucial for effective thermal performance. Once you’ve measured your ceiling dimensions, the next step is estimating the quantity of insulation needed. This process involves multiplying the measured area by your desired thickness, ensuring that your chosen insulation provides optimal R-value and energy efficiency.
For example, if your attic measures 50 square metres and you aim for a 150mm thickness, multiply these figures to determine the volume of insulation required. Keep in mind that standard roll or batt sizes, such as 1200mm wide and 2400mm long, can simplify the purchase process.
To avoid waste and ensure a snug fit, compare your measurements with these standard sizes. This careful calculation guarantees your ceiling insulation sizes will cover the entire space without gaps, maximising warmth and reducing energy bills. Proper estimation of ceiling insulation sizes makes all the difference in creating a comfortable, energy-efficient home.
Choosing the Right Insulation Size for Your Home
Consulting Professionals – When to seek advice from insulation experts
Choosing the perfect ceiling insulation sizes is a delicate dance—an intricate puzzle where every piece must fit snugly to craft a fortress of warmth and efficiency. When the realm of insulation becomes a labyrinth, consulting professionals transforms from a mere suggestion into an essential step. Expert advice ensures that your chosen ceiling insulation sizes adhere to local building regulations and meet the unique demands of your climate zone, preventing costly oversights.
In the quest for optimal comfort, knowing when to seek the wisdom of insulation specialists can be the difference between an average installation and a masterpiece of thermal mastery. They bring a keen eye for detail, assessing your attic space dimensions and the intricacies of your home’s architecture. Whether you opt for pre-cut sizes or custom dimensions, their insight guarantees that the insulation will fit seamlessly, avoiding gaps that could undermine your energy efficiency.
Remember, the right ceiling insulation sizes are not merely numbers—they are the foundation of a home that breathes warmth and resilience. Trusting the expertise of professionals ensures your investment is both sound and sustainable, transforming your house into a sanctuary of comfort that endures through the seasons.
DIY vs Professional Installation – Pros and cons of each approach regarding sizing and installation
Choosing the right ceiling insulation sizes can be a pivotal decision in creating a home that’s both energy-efficient and comfortable. When considering DIY installation, homeowners often appreciate the control and cost savings involved. However, without precise measurements and knowledge of standard widths and lengths, there’s a risk of mismatched sizes that leave gaps or require awkward adjustments. This can compromise the insulation’s effectiveness and lead to higher energy bills over time.
On the other hand, professional installation brings expertise in selecting optimal ceiling insulation sizes tailored to your attic’s unique dimensions and your local building regulations. Insulation specialists are adept at custom fitting, ensuring that the sizes of insulation batts or rolls align perfectly with your space, reducing waste and enhancing thermal performance.
- Pros of DIY: cost-effective, flexible scheduling, immediate control over materials
- Cons of DIY: potential for sizing errors, need for proper tools, risk of non-compliance with standards
- Pros of professional: precise sizing, adherence to codes, expert advice on insulation thickness suitable for your climate zone
- Cons of professional: higher upfront cost, dependency on scheduling
Ultimately, the choice hinges on your confidence in measuring your ceiling dimensions accurately and understanding the nuances of insulation sizes. Both approaches have their merits, but recognising when expert guidance is necessary can make all the difference in achieving a seamless, long-lasting insulation solution.
Cost Considerations and Budgeting
Price Ranges for Different Sizes – Cost comparison across various sizes and types
Cost considerations and budgeting for ceiling insulation sizes often reveal a nuanced landscape where value and efficiency collide. The price ranges fluctuate significantly depending on the size and type of insulation chosen, making it essential to weigh long-term savings against upfront costs. Larger sizes, like extensive rolls or custom-cut batts, tend to offer more economical options per unit of coverage, but they may require professional handling for optimal installation. Conversely, smaller or pre-cut pieces might seem more manageable but can lead to wastage and increased expenses.
When comparing costs across various ceiling insulation sizes, it’s helpful to recognise that materials like mineral wool or spray foam have different pricing structures. These costs are influenced by R-value, thickness, and the dimensions of the insulation, which directly affect overall expenses. To better understand the financial landscape, consider this simple breakdown:
- Assess the total area needing insulation coverage.
- Match your measurements to standard or customised ceiling insulation sizes.
- Factor in the installation method—DIY or professional, as this impacts overall costs.
Ultimately, investing wisely in the right ceiling insulation sizes aligns not only with your budget but also with your home’s energy efficiency goals.
Long-term Energy Savings – How proper sizing impacts energy bills and insulation efficiency
Choosing the right ceiling insulation sizes isn’t just about fitting materials into space; it’s a strategic decision that can significantly influence your long-term energy bills. Properly sized insulation acts as a barrier that maintains indoor temperature, reducing reliance on heating or cooling systems. When insulation is too thin or improperly fitted, thermal transfer increases, leading to higher energy consumption and inflated costs. Conversely, selecting the correct ceiling insulation sizes ensures maximum efficiency without overspending on unnecessary material.
Investing in the appropriate sizes of ceiling insulation can yield remarkable savings over time. For example, larger rolls or custom-cut batts designed to match specific ceiling dimensions minimise wastage and optimise coverage. This precise sizing not only adheres to building regulations but also enhances insulation performance. It’s a delicate balance—oversized or undersized insulation can compromise energy efficiency, ultimately affecting your home’s comfort and your budget.
To truly grasp the impact of proper sizing, consider this: optimal ceiling insulation sizes directly influence the R-value—a key factor in thermal resistance. By matching insulation sizes to your space, you ensure consistent coverage, which translates into reduced heat loss and lower energy bills. In the end, the careful selection of ceiling insulation sizes isn’t just about material costs; it’s a long-term investment in your home’s energy efficiency and comfort.
Installation Tips for Optimal Insulation Fit
Preparing the Space – Clearing areas and ensuring proper ventilation
Maximising the effectiveness of your ceiling insulation depends heavily on how precisely you prepare your space. Clear away clutter and debris from the attic or ceiling area, creating a clean canvas for installation. Proper ventilation isn’t just a recommendation — it’s essential. Stale air can compromise insulation performance, leading to dampness or mould that diminishes energy efficiency. Ensuring good airflow helps maintain the integrity of the ceiling insulation sizes chosen, preventing heat loss or gain caused by trapped moisture.
Before laying down your insulation, measuring your space with care is vital. Accurate measurements of ceiling dimensions allow for optimal fit, avoiding gaps that create thermal bridges. Sometimes, adjusting the thickness of your ceiling insulation sizes can make a significant difference in achieving the recommended R-values. For larger or irregularly shaped areas, consider using pre-cut or custom-sized options, which can streamline installation and reduce waste. Remember, precise sizing enhances insulation performance, translating directly into lower energy bills and improved comfort.
Proper Placement and Coverage – Ensuring even coverage and avoiding gaps or compression
Achieving an effective thermal barrier hinges on the meticulous placement of your ceiling insulation sizes. It’s not merely about filling the space but crafting a seamless, uniform layer that maximises energy retention. Proper placement begins with understanding the precise dimensions of your ceiling and attic space — a task that demands both patience and precision. Gaps or compressed sections within your insulation can create thermal bridges, undermining the very purpose of your investment. To prevent this, ensure insulation is laid without gaps or compression, which can compromise its R-value and overall performance.
For optimal coverage, consider the layout of your ceiling insulation sizes. Use overlapping techniques and avoid leaving voids—these imperfections can lead to uneven heat flow and energy loss. If your attic or ceiling area is irregularly shaped, customised sizes or pre-cut options can significantly streamline installation and reduce wastage. In some cases, layering different thicknesses of ceiling insulation sizes can enhance thermal resistance, especially in regions with extreme climatic conditions. Remember, precise sizing and careful placement are fundamental to a well-insulated space, directly influencing your energy efficiency and comfort levels.
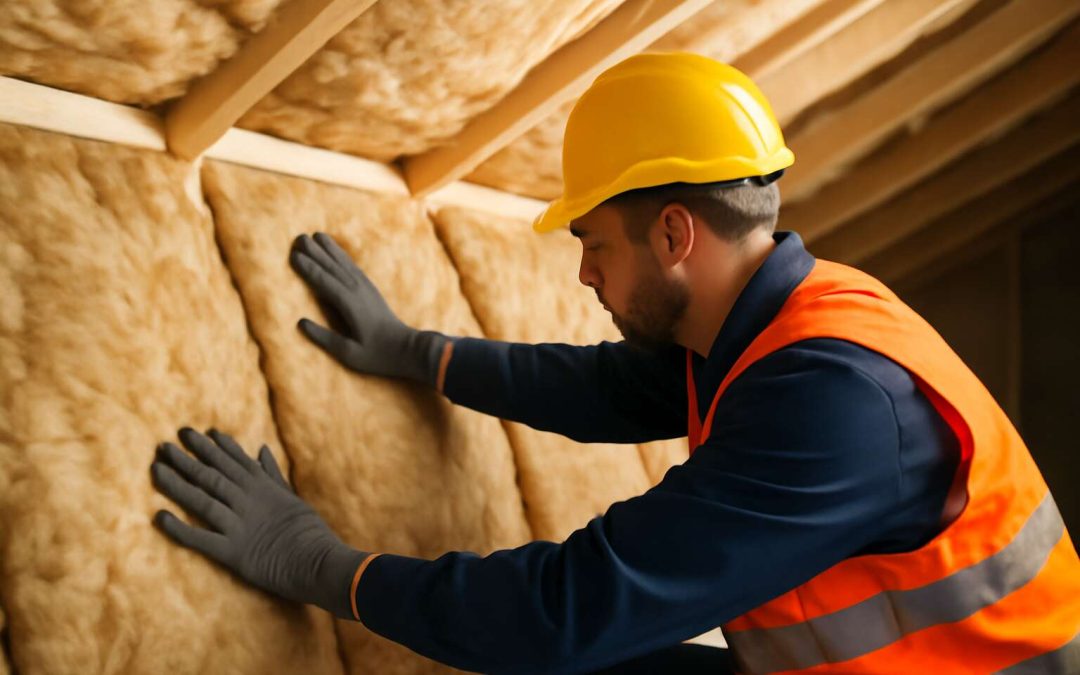
Safety Precautions – Using protective gear and handling insulation materials safely
Handling ceiling insulation sizes with the finesse of a seasoned diplomat can make all the difference between a cosy haven and a draughty oubliette. When installing, don’t merely toss rolls or batts into place — aim for a snug, tailored fit, much like a bespoke suit. Proper fitting hinges on a meticulous approach: measure twice, cut once, and always double-check those ceiling insulation sizes before proceeding. A miscalculation may result in compressed insulation, which not only diminishes its R-value but also invites thermal bridges that sap your comfort—and your energy savings.
To achieve an impeccable insulation fit, consider the following: use a sharp utility knife for custom cuts and gently press the material into corners and irregular spaces. For larger or oddly shaped ceilings, pre-cut or custom-sized options can save time and prevent wastage. Remember, a seamless layer of insulation ensures even coverage, preventing gaps that could undermine the entire thermal barrier. Safety should never be sacrificed — always equip yourself with protective gear, including gloves, goggles, and a dust mask. Handling insulation materials with care not only preserves your health but guarantees the integrity of your installation. After all, an investment in proper sizing and safe handling is an investment in enduring comfort and energy efficiency.
Maintenance and Future Upgrades
Checking Insulation Effectiveness – Signs that insulation may need replacement or upgrade
Over time, even the most meticulously chosen ceiling insulation sizes can reveal their true condition — or lack thereof — through subtle yet telling signs. If you notice an unexpected increase in energy bills, it often signals that your insulation’s effectiveness has waned, perhaps compromised by compression, moisture, or age. These markers serve as a quiet plea to reassess and potentially upgrade your ceiling insulation sizes for optimal performance.
It’s crucial to periodically check for uneven insulation coverage or visible gaps, which can undermine the integrity of your thermal barrier. A simple visual inspection might suffice, but employing a thermal camera can uncover hidden cold spots that betray insulation deficiencies. Recognising these symptoms early ensures that you can maintain energy efficiency without unnecessary expenditure or discomfort.
In some cases, the signs point toward a need for a more comprehensive evaluation: consider the following factors to determine if your ceiling insulation sizes require adjustment or replacement:
- Inconsistent indoor temperatures despite active heating or cooling systems
- Visible deterioration, such as sagging or mould growth
- Increased noise transmission from outside or between rooms
By paying close attention to these indicators, homeowners and professionals alike can make informed decisions about maintaining or upgrading ceiling insulation sizes, ensuring longevity and energy efficiency for years to come. Remember, the right insulation size isn’t just about initial installation — it’s a vital component of your building’s long-term resilience and comfort.
Upgrading Insulation Sizes – When and how to increase thickness or replace older insulation
Time’s relentless march can silently erode the potency of your ceiling insulation sizes, turning a once-thriving thermal shield into a forgotten relic. When the chill seeps through or energy bills soar unexpectedly, it’s often a sign that the insulation has succumbed to compression, moisture ingress, or simple age. Upgrading insulation sizes isn’t merely about adding more material; it’s about restoring the delicate balance between warmth and cool beneath your roof’s shadowed vault.
When contemplating future upgrades, consider the existing dimensions of your ceiling insulation. Increasing the thickness of your insulation can dramatically enhance its R-value—the measure of thermal resistance—thus fortifying your sanctuary against the cold. In some cases, older insulation may need complete replacement, especially if it has sagged or become mould-ridden. To achieve optimal coverage, it’s prudent to measure your attic space meticulously, ensuring the new ceiling insulation sizes adhere perfectly to the space’s depths and contours.
- Assess the current insulation thickness and condition.
- Determine the desired R-value based on your climate zone.
- Calculate the additional thickness needed to meet recommended standards.
Sometimes, a simple augmentation suffices; other times, a comprehensive overhaul becomes inevitable. For example, adding a layer of reflective insulation beneath existing materials can double the thermal barrier—especially in regions where heat gain is a constant nemesis. Employing professional guidance or precise measurement tools ensures the new ceiling insulation sizes fit seamlessly, avoiding compression or gaps that would undermine performance.
The dark allure of an upgraded ceiling insulation size lies in its promise of renewed comfort, reduced energy costs, and the preservation of your abode’s ancient resilience. When the time comes to decide whether to extend or replace, remember that each choice shapes the fortress of warmth you’ve built—an unseen guardian against the encroaching shadows of the cold.